Monday, June 22, 2015

Crispy Baked Asparagus with Lime Aioli Dip


When visiting  farmers market you will not only get the freshly picked vegetables of the season but you can also learn a recipe or two from the vendors! Here's one of them ..... 

Ontario's sweet asparagus are still in season {and the price is really good!}. Instead of my usual grilled or steamed asparagus with lemon-herb butter recipe, I tried this delicious {I have to warn you it can be addictive!} baked, crispy asparagus recipe I learned from a farmer/vendor.


She did not give me the exact measurement of the ingredients so I just made my own. For this batch, I used:
A bushel of fresh asparagus {hard ends removed}
3 tablespoons corn starch
2 eggs (beaten)
1 cup Parmesan cheese
1 cup bread crumbs
1 tablespoon ground black or white pepper


Here's how I did it:
In a large Ziploc bag, toss the asparagus in corn starch
Whisk the eggs in a large baking dish {enough space to  dip the asparagus lengthwise}
In large plate, mix the Parmesan cheese, bread crumbs and ground pepper.
Spray baking sheet with non-stick cooking oil or coat baking sheet with olive oil
Dip the asparagus in the egg then into the breadcrumbs/cheese mixture. Make sure it is well coated 
Place coated asparagus on the cooking sheet side by side
Baked at 400 degrees F for 20 minutes. After the first 10 minutes, remove from oven and flip the asparagus over then continue baking for another 10 minutes or until golden brown.


While baking the asparagus,  I thought I can add another layer of flavour by making a Lime Aioli dip. Easily done by mixing 3/4 cup mayonnaise, zest of 1 medium lime, 2 tablespoons lime juice, 1 clove of finely chopped garlic, salt and pepper to taste.


This appetizer is best served right after taking the asparagus from the oven. It is crispy, tasty and when dipped with aioli, the freshness and tanginess of the lime will balance the saltiness of the Parmesan cheese. 

Simply delicious!

Linking with : Tweak it Tuesday
                        Inspire Me Tuesday
                       The Scoop

Monday, June 15, 2015

The Birdsong Rustic Vegetable Garden Chronicle {Part 2}

WARNING : This post is LOADED WITH PHOTOS. Either you run away from your computer now or get comfy with your mug of coffee/tea and read on...  

It's been weeks since I shared the beginning of our adventure in re-claiming the goats' and lambs' area and turn it into a veggie garden {you can read the previous post here}. Weekends are the only time we can devote at least 4 hours on this project and sad to say, the weather has been so unpredictable {rain, sun, hail, rain and repeat!} which definitely brought chaos in our work schedule. We do what we can, so here it goes .....

May 2


After all the raking and cleaning, we ended up with at least 30 filled-to-the-rim leaf bags!


Dear hubby also finished building the 4 raised beds so it is my turn to prep the soil .... 


After searching the net, I decided to try the "lasagna" gardening technique which basically refers to the method of building the garden by adding layers of organic materials. Just like making lasagna, layering is the key. I added layers of newspapers/brown corrugated cardboard, peat moss, dried leaves, compost and soil.


We are lucky because over the years, the previous owner of the house made a huge pile of cow, goat and poultry manure at the back end of the property which has matured and can now be used as compost.  All we need to do is haul the compost from the pile to the garden {it was hard work going back and forth, I tell you!}


Now we rest and let nature do its job on these beds for a week before planting ....


May 18

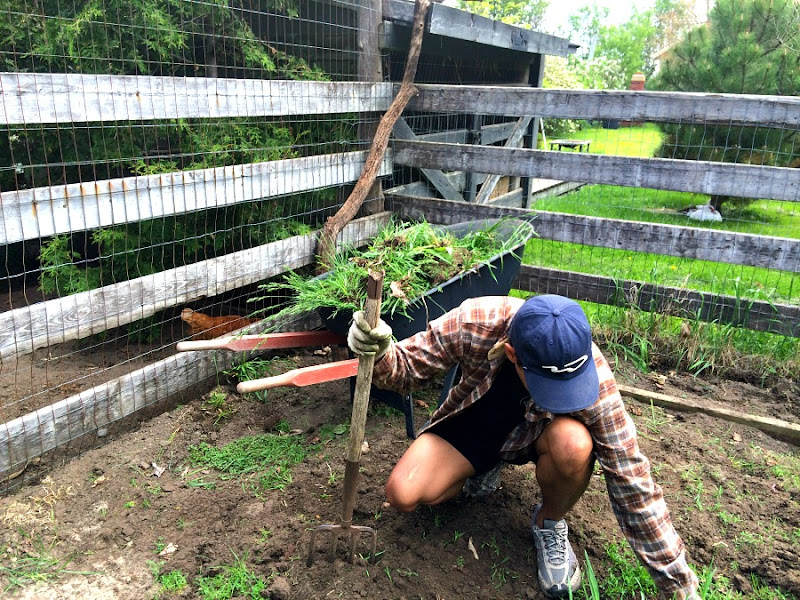
It took more than 2 weeks {longer than what we wanted} before the weather cooperated. Heavy rains prevented us to work in the garden so by the time we were back, the weeds were almost up to our knees!


Hubby hauled weed-filled-wheelbarrow 7x before the garden look decent. The good news was that there was no weed on the beds {the layers of news papers and hay prevented weed growth}, so I started getting my hands dirty and plated ..... herbs, cabbage, beans, tomatoes, spinach, peppers, lettuce, pickling cucumbers, raspberries and strawberries. "Tama ang kasabihan ..... magtanim ay di biro!" Oh, how my back ached after .....


Back aches, blisters, sunburn and all, I am still thankful for the opportunity to grow something in my own backyard. It is minuscule compared to the acres and acres of our neighbors' farm lands surrounding us, but growing these vegetables is like actively participating in God's everyday miracle. Now, all we need to do is to tenderly care for them and lift our prayers that God will do the rest!


June 2

Weather permitting, I visit my little plants every afternoon. Oh yes, I talked to them, sing to them {not sure though if my singing voice is helping at all}. So far, they look good and healthy ....


In two days, the gourmet lettuce and spinach are ready for salad. The beans are sprouting fast. The cabbage are getting sturdy day by day. The herbs are getting greener and taller.


Even the berries are showing good growths. Flowers are showing up on my strawberry plants. The raspberry which was only a piece of stick when we planted it is now green with leaves!


Meanwhile, Jayvee laid some old stones along the pathway. This is still a work in progress, another project for the coming weekends.


For now, we turn to our dear Mother Nature ... may the force be with us for a successful veggie garden on our first year!


Linking with : The Scoop
                        Inspire Me Tuesday

Monday, June 8, 2015

My Version of Korean BBQ Marinade


We had a perfect spring weather last Saturday so we spent almost the whole day doing projects in our backyard. Hubby worked on the fire pit while I continued cleaning the old goat feeder that I am turning into a rustic bench {this is for another post} for my veggie garden.


By 6:30 PM dear hubby said "I think it is time to smell the roses." In our home, smelling the roses means lounging on the deck while enjoying BBQ and a bottle of ice cold beer or a glass of wine. Who can say no to that, so smell the roses it is!


To the grill he went and cooked the Korean chicken BBQ which I marinated the night before.

Lately, the flavour of freshly grated ginger is taking centre stage in my kitchen. It's fresh, slightly sweet flavour and aroma with a little spice remind me so much of home cooked meals at home in Manila : "Tinolang Manok", "Salabat at Suman, "Adobo sa Luyang Dilaw" among others. This time, I used the ginger to make my own Korean BBQ marinade.


The flavour of ginger is mixed with garlic, spring onions, coriander, soy sauce, honey and sesame oil to give that distinct taste of Korean dishes. Instead of beef short ribs {which is normally used for Korean BBQ called Kalbi}, I deboned chicken thighs leaving a bit of skin. When grilled. the marinated skin on chicken will caramelized {due to the sweetness of the honey} for added flavour.


Served on a bowl of boiled brown rice and a side dish of kimchi, this Korean chicken BBQ is worth adding to your summer menu.


The marinade goes a long way too. Vegetarians can use it to marinate tofu {I used extra firm tofu for my dish} for 3-4 hours before grilling. 


Korean BBQ Marinade

Ingredients
3 Tbsp freshly grated ginger
3 cloves garlic, minced
1 cup scallions, finely chopped
1/2 cup coriander, leaves and stem finely chopped
1 cup light soy sauce
4 Tbsp honey
4 Tbsp water
1 1/2 Tbsp sesame oil
1 Tbsp freshly ground pepper

Procedure
Mix all ingredients in a bowl and use as marinade for chicken, beef, pork or tofu. Marinate meat overnight before grilling for more flavour.


Linking with: The Scoop
                       Home-Making Mondays

Wednesday, June 3, 2015

DIY Project I Vintage Tin Can Flower Pots


When I was in grade 3 or 4, one of our school projects was to grow a couple of plants using recycled tin cans. My dear dad brought big empty cans of powdered milk from work where I (or should I say my dad) planted mung beans and native pepper (siling labuyo). It was a delight to compare what I had with those of my classmates'. Last weekend, I kicked that project up a notched by planting some flowering plants in vintage tin cans. These rustic planters are so perfect for our equally rustic picnic table in the backyard.
Materials: Vintage tin cans (I got mine for 50 cents a piece from a yard sale), inexpensive flowering plants, potting soil


Easy as 1, 2 ,3!
1. Using a big nail and hammer, put holes at the bottom of the cans for drainage,
2. Put just enough potting soil in can.
3. Plant your your favorite annual flowers and water regularly.


Voila!


I love how they embellish my unpainted and dated picnic table!


Speaking of picnics, we have one at least every other day here in the backyard and we are loving every minute of it! Ah, the joys of  spring .... pure bliss!


Linking with : Tweak it Tuesday
                        Inspire Me Tuesday
                        Treasure Hunt Thursday


Related Posts Plugin for WordPress, Blogger...